Web Development

Introduction

In the dynamic realm of web development, mastering the creation of robust and efficient APIs is essential. The advent of Next.js, a React-based framework that seamlessly integrates server-side rendering and other powerful features into the front end, has elevated the process of building APIs. This tutorial delves into constructing a REST API in Next.js using the Prisma ORM, a cutting-edge database toolkit.

Prerequisites

Before delving into the tutorial, ensure that you have the following prerequisites installed:

Node.js 18.17 or a later version.

Next.js: Install Next.js using the command: npm install next.

Prisma CLI: Globally install the Prisma CLI with the command: npm install -g @prisma/cli.

Step 1: Set up a Next.js Project

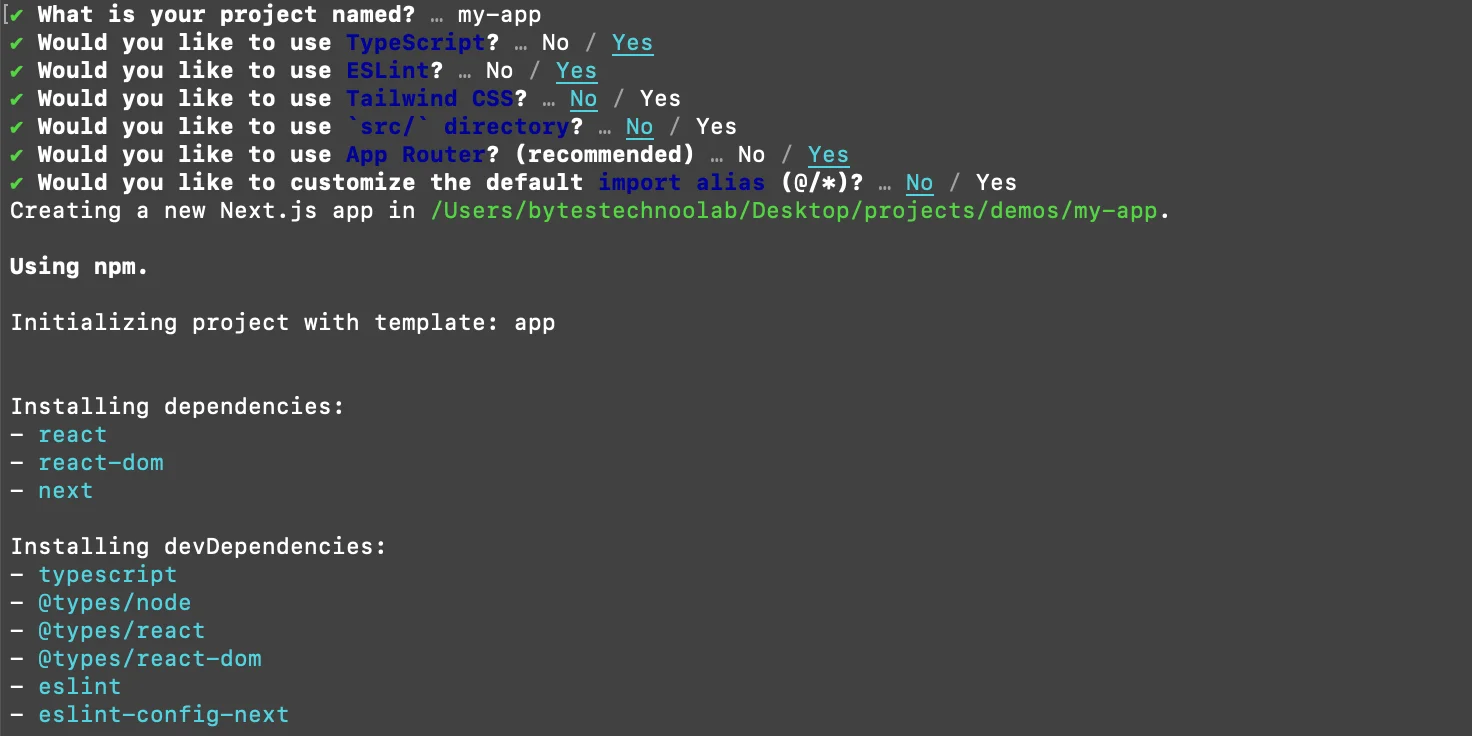
Initiate a new Next.js app using create-next-app, which automates the setup process. Run the following command:

image1

Answer the prompts to configure your Next.js project.

image2

After completing the prompts, navigate to the project directory (my-app) and install the required dependencies:

image3

Step 2: Set up Prisma

Install the Prisma CLI as a development dependency.

image4

Invoke the Prisma CLI using:

image5

Initialize your Prisma project by creating the schema file template:

image6

You will see the new auto generated directory for Prisma and schema.prisma file under it.Now we have set up the below step to complete the setup for Prisma with database connection.

Schema.prisma file

image7

-Set the DATABASE_URL in the .env file to point to your existing database.

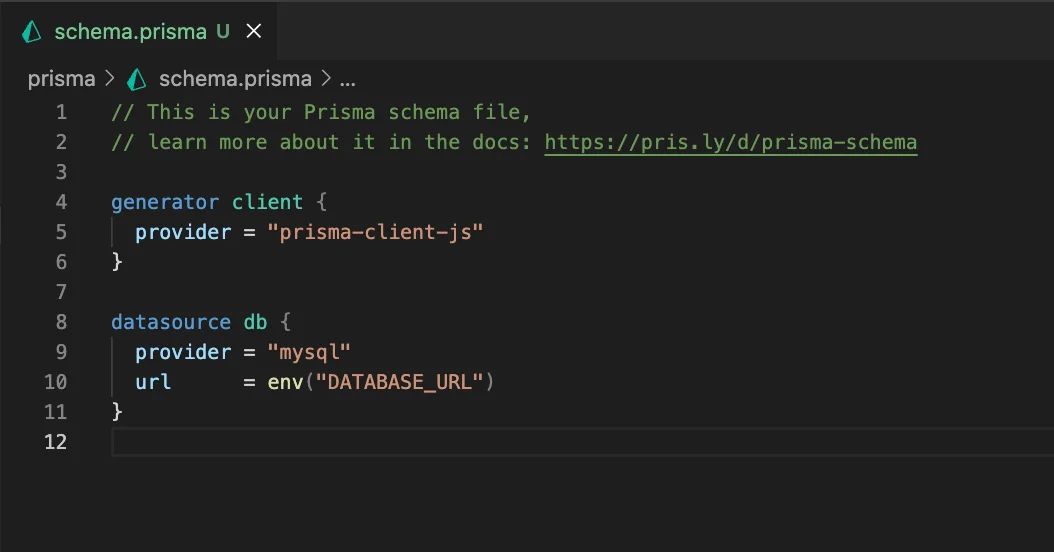
Set the provider of the datasource block in schema.prisma to match your database: in this article we will use mysql

image8

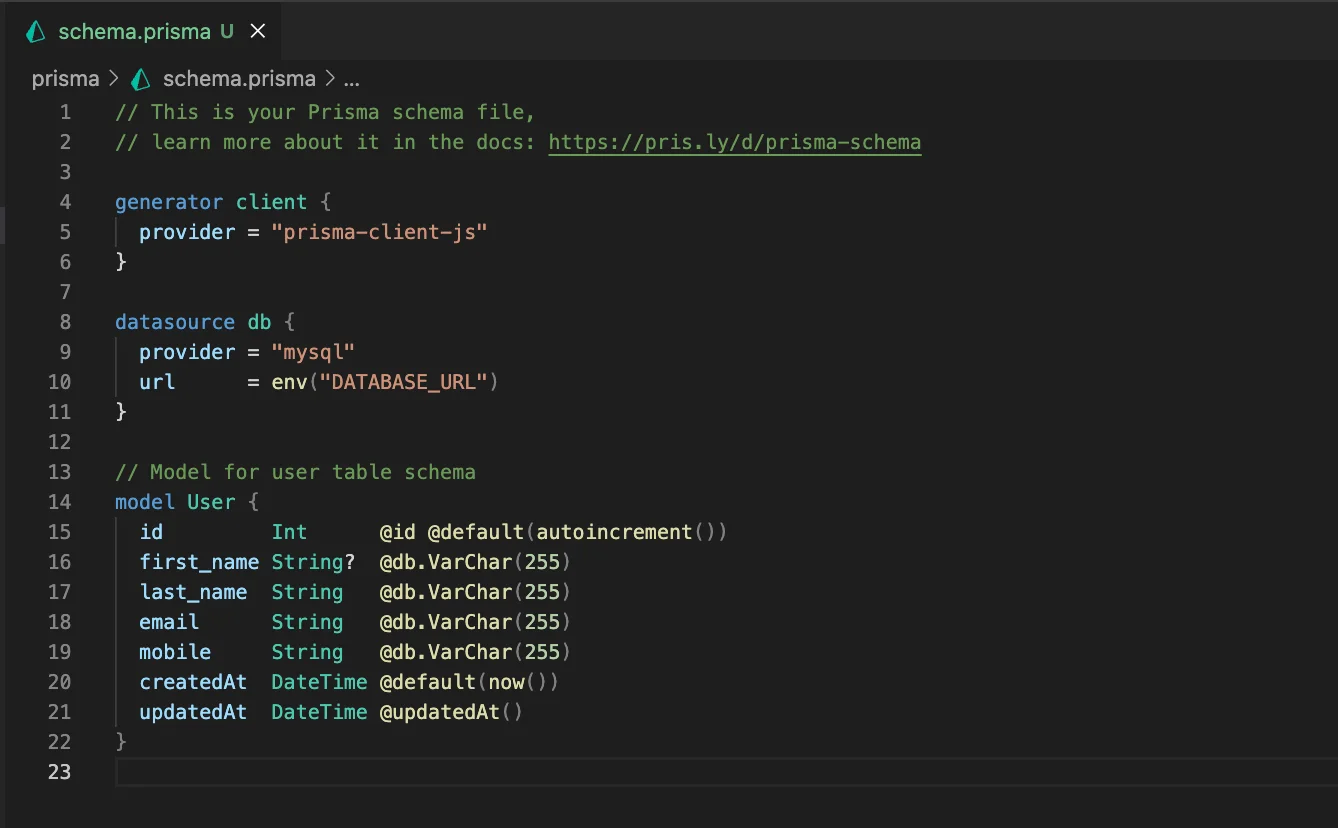
Now we have complete setup of Prisma database connection. Let’s create a model for database tables. All the models will be added into the schema.prisma file below the database connection.

image9

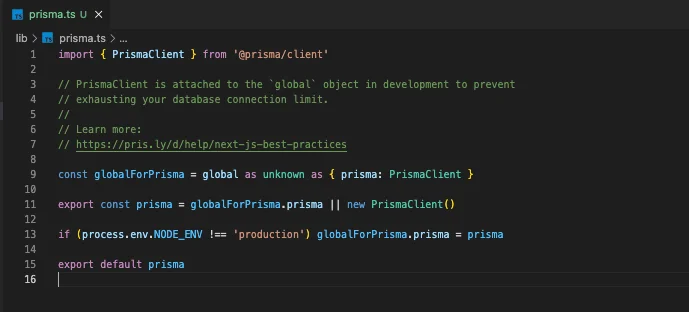
Now, we need to create Prisma client which connects with the database

lib/prisma.ts

image10

After that, generate the migration file of tables which update the database based on the model.

npx prisma migrate dev –name init

With the help of the above steps, we are able to setup a Prisma client with database connection, user table model, migration file which updates the database table schema. Now, we need to create the API using Prisma with the mysql database.

Step 3: Create API Routes

Inside the app directory, we need to create a new directory called ‘api’ which is the route for all the API endpoints. In this article we will create a ‘GET’ and ‘POST’ request which will get the users table data and create new users in the user table.

app/api/users/route.ts

image11

In the above file we have a GET and POST request handler which handles the request and based on the request it will return the response to the client.

Now we have our GET and POST endpoint ready to use. Our application is running on localhost:3000 and all the API will be accessed under localhost:3000/api route.

Let’s call a GET request which will return all the users.

curl –location ‘http://localhost:3000/api/users

You can use this rest API in your next.js application using fetch or axios HTTP client.

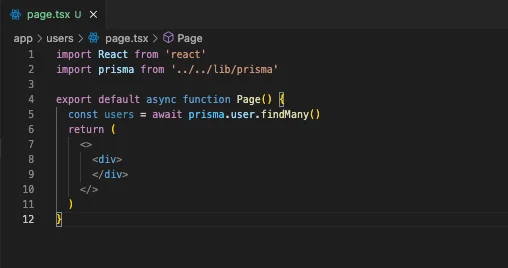
Prisma client provides the feature like direct query from your react component without creating REST API but it will be only available for server side component because client side browser does not have support for nodejs.

For direct access of the table in your server-side component you can use the below method of Prisma client.image12

Using Prisma with Next.js offers several benefits that contribute to a more streamlined and efficient web development process. Here are some key advantages:

Seamless Integration

Type-Safe Database Access

Productivity Boost

Modern Database Toolkit

Declarative Data Modeling

Database Agnostic

Real-Time Collaboration

Performance Optimization

GraphQL Support

Contact NextJS and Prisma Experts

Conclusion

This article guided you through setting up a Next.js project with Prisma ORM for database connectivity. Leveraging Prisma ORM, you can effortlessly develop a REST API that communicates seamlessly with the database. Additionally, this tutorial will help you to create both frontend and backend components within a single project, eliminating the need for setting up a separate Node.js server like Express or Nest.js solely for developing REST APIs.

How Bytes Technolab Can Make a Difference?

Are you ready to take your front-end and backend development to the next level with Next.js. Our Next.js developers are here to elevate your digital footprint by creating a seamless, lightning-fast, and captivating user experience.

Get in touch with us to get more info! 

Related Blogs

AI-Powered Medical Imaging: Bringing Precision Healthcare into the Future

AI-Powered Medical Imaging: Bringing Precision Healthcare into the Future

Many new healthcare advances will arise when artificial intelligence and medical imaging combine. The aspect that changes is as immense as the s...

Selecting the Best Adobe Experience Manager Solution for Your Needs

Selecting the Best Adobe Experience Manager Solution for Your Needs

Creating and managing engaging content across various platforms is important for eCommerce stores in this ever-evolving digital commerce era. Th...

How Adobe Commerce Development Partner Boosts Your eCommerce Success?

How Adobe Commerce Development Partner Boosts Your eCommerce Success?

Modern retail owners have turned to accredited eCommerce development companies as their technical consulting and implementation partners. By han...